
How to rip WAV files from your album using Audiograbber
To ensure optimal audio quality for our customers, we require that AFM members upload high-quality WAV files — 44.1 kHz, 16-bit stereo. Usually, people have their album on a CD and create audio files from that CD
There are many programs that can do this. If you're unsure where to start, we recommend the free program Audio Grabber for Windows users. Of course, many other programs such as iTunes, Windows Media Player and many others can be used to "rip" WAV files from your album.
We're providing the following instructions as a courtesy — however, we don't offer technical support for Audiograbber or other third party software. If you have further questions about using Audio Grabber, please consult the Audio Grabber website.
1. Download Audiograbber
You can download it here at Download.com.
2. Install it
When the file has finished downloading, opening the file you downloaded and click "Run", "Save", or "Install" when prompted by your computer. An installation program will open and begin installing Audio Grabber.
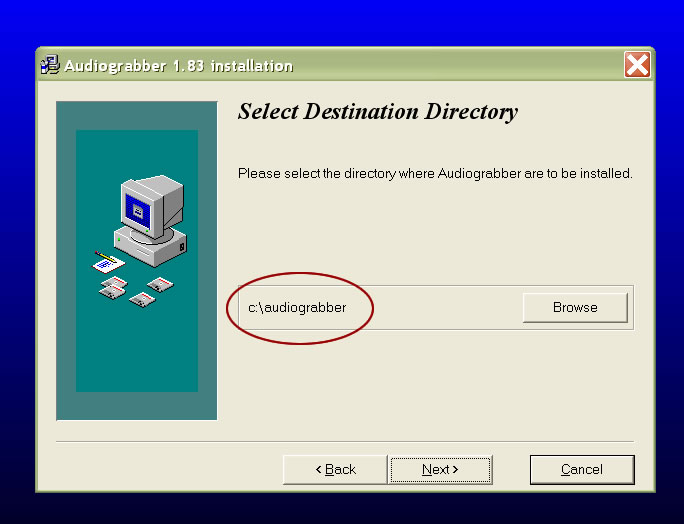
3. Select destination directory
During the installation process, you will see a step titled "Select Destination Directory". Please review the directory selected by default and change it if you'd like. Make a note of this directory; it's where your finished WAV audio files will be stored.
4. Finish the installation and run Audiograbber
No other configuration is required — simply follow the instructions to finish the installation. Next, you can start up Audiograbber. Usually you can find new programs at the end of your Start Menu. A new windows called "Audiograbber" should appear.
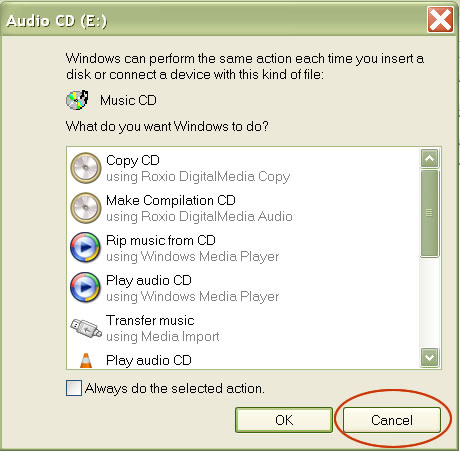
5. Insert your album in to your CD drive
If Windows gives you a prompt similar to this, click "Cancel".
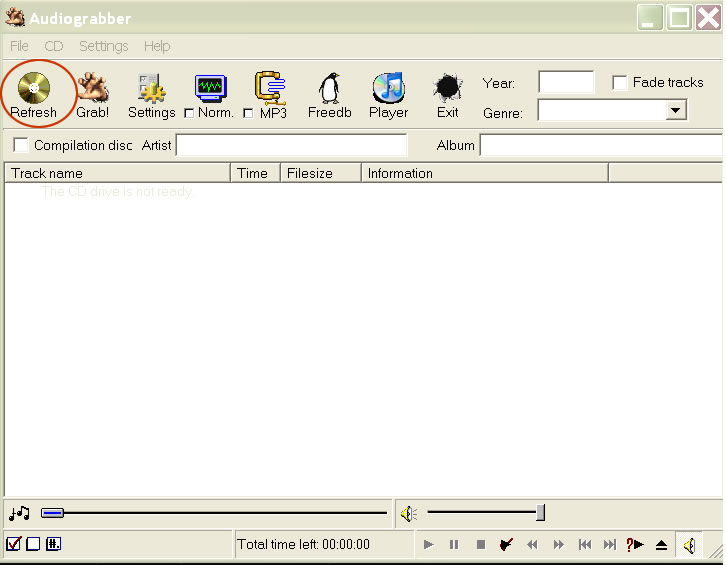
6. In Audiograbber, click the "Refresh" button
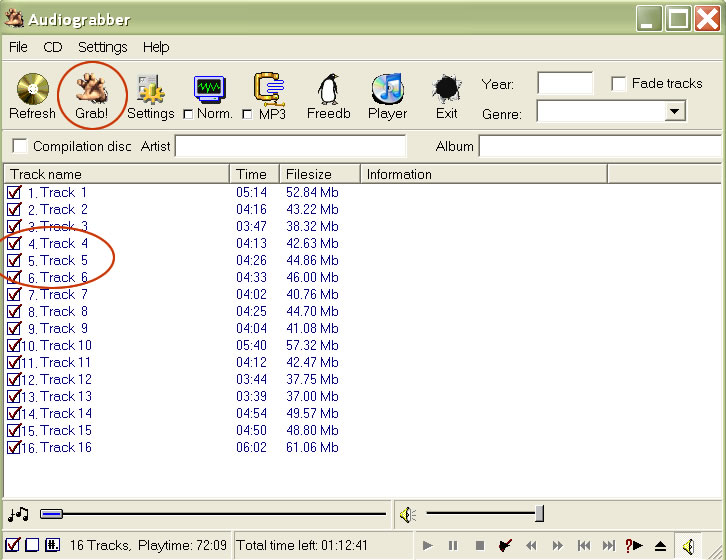
You will then see a screen with all the tracks on your album and their respective durations and filesizes, similar to this one:
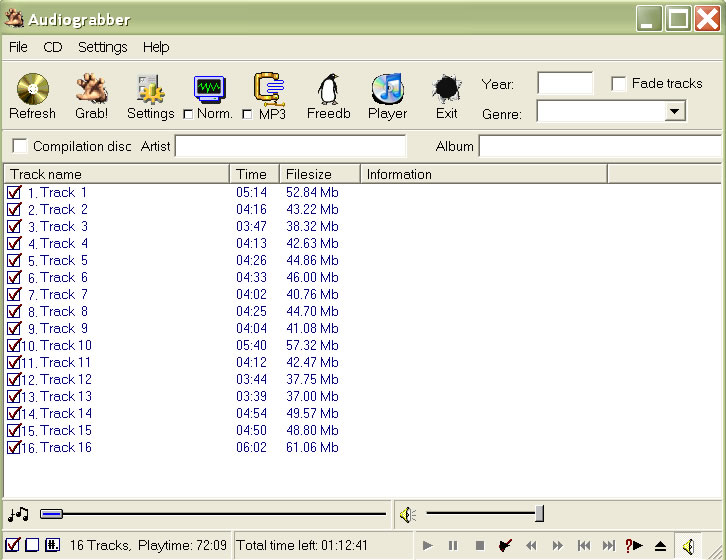
7. Select the tracks you want to "rip" (i.e. create WAV files of), and click on "Grab"
All the tracks are checked by default… if you don't want to use everything, you can deselect some of the checkboxes.
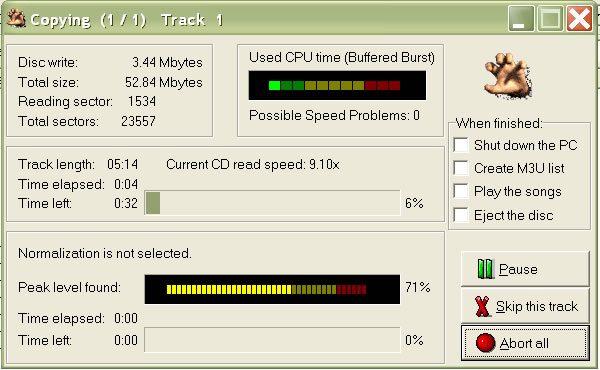
8. Wait for it to finish ripping
A new window will open, showing you the how far along you in the process of ripping your album to WAV files. No action is required for you at this point.
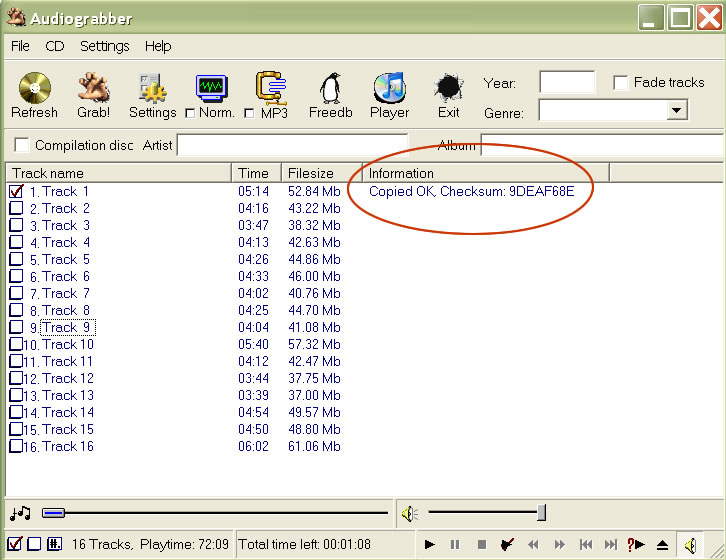
As tracks are finished, they will read "Copied OK" on the track listing.
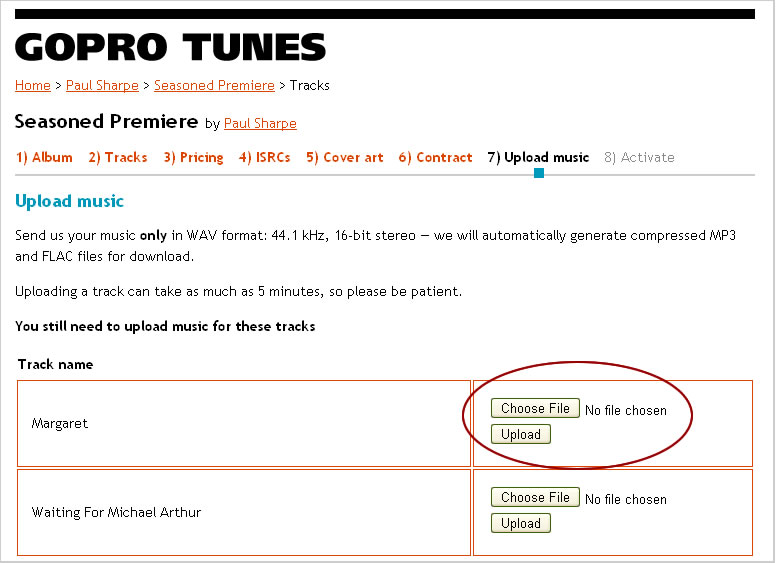
9. Go to the GoPro Tunes website and upload your WAV files.
Assuming you've already finished all the prior steps on the GoPro Tunes website, all you need to do now is proceed to the "Upload Music" area of your album, and upload your WAV files! You will find them in the directory that you chose in Step 3 above.
10. Finished!
If everything goes according to plan, at this point you'll have uploaded all the WAV files you need for your album! If you're still having problems, don't forget that you can contact us.
©2010 AFM

Welcome to GoPro Tunes, an online store offering music from members of the American Federation of Musicians of the United States and Canada (AFM), a labor union representing professional musicians with over 90,000 members.
Fair pay—our members set their own prices and receive back 100% of sales revenues, minus credit card processing fees. They're also protected in the studio with union recording agreements.